How to setup Mission Tech Desktop Wi-Fi Cube Camera to Ivideon Cloud – Model 3MP-Cube
- Mission Tech
- Aug 21, 2021
- 1 min read
Step 1
Contact your security provider to set up your Ivideon user account if you have not already.
Step 2
Download and install Ivideon Client App for your Android or Apple phone or tablet and start the App.
Step 3
Click on "+" the add camera button on the top right of the Ivideon Android or Apple Client App.

Step 4
Select nobelic

Step 5
Scroll down the list of cameras and select Nobelic NBQ-1310F

Step 6
Click Next

Step 7
Click Next after you hear a beep

Step 8
Click Next then select your Wi-Fi access point and enter it's password

Step 9
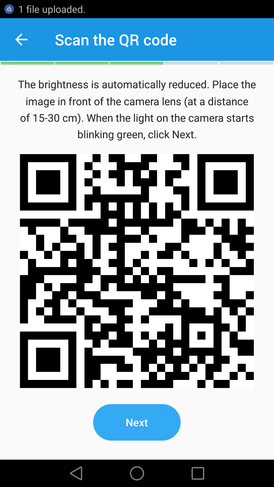
Scan the QR code by placing the camera in front of your mobile phone. The camera will beep once it is successful.
Step 10
Wait for the connection to Ivideon Cloud and you are done!
You are free to choose any Ivideon Subscriptions plans you like. There is no lock-in contract, and you can switch between plans at any time.
Note:
All Mission Tech cameras have had its Ivideon cloud activation key of USD15 have been paid for. Contact us if you are required to make this payment.


Comments