Blog
How to archive your recordings with Ivideon.
Step 1
Sign in to your Ivideon account at www.ivideon.com.
Step 2
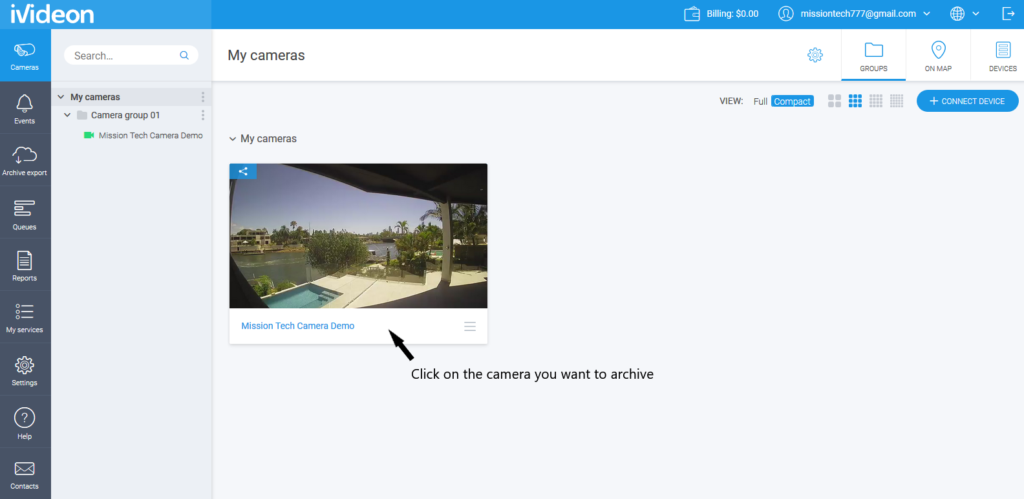
Click on the camera you want to archive.
Step 3
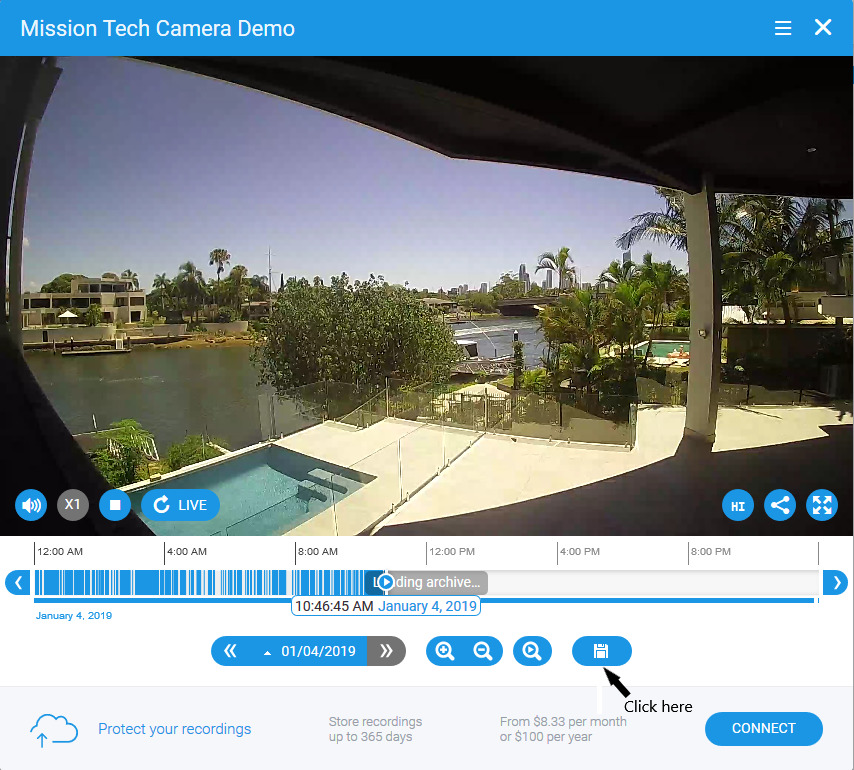
Click on the Export archive recordings disk icon.
Step 4
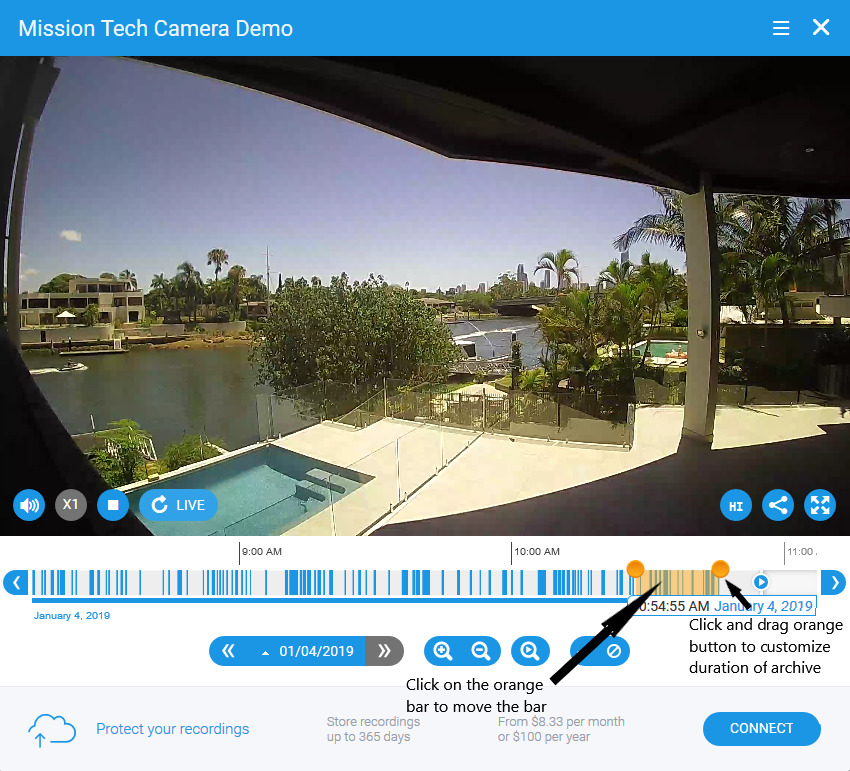
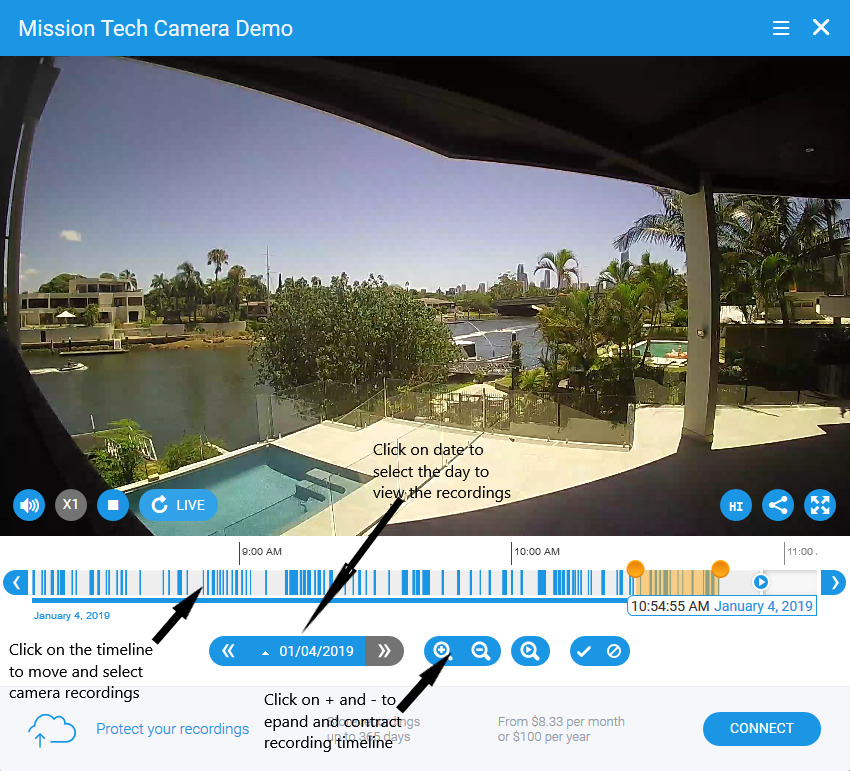
Click on the orange highlighted bar to select the recordings you would like to archive:
- The orange buttons to expand and contract the timeline of the archive.
- Click on the orange bar to move the timeline of the archive.
Note:
- Click and drag the timeline to select the camera recording.
- Click on + and – to expand and contract camera recording timeline.
- Click on the date to select desire day to view the recording.
Step 5
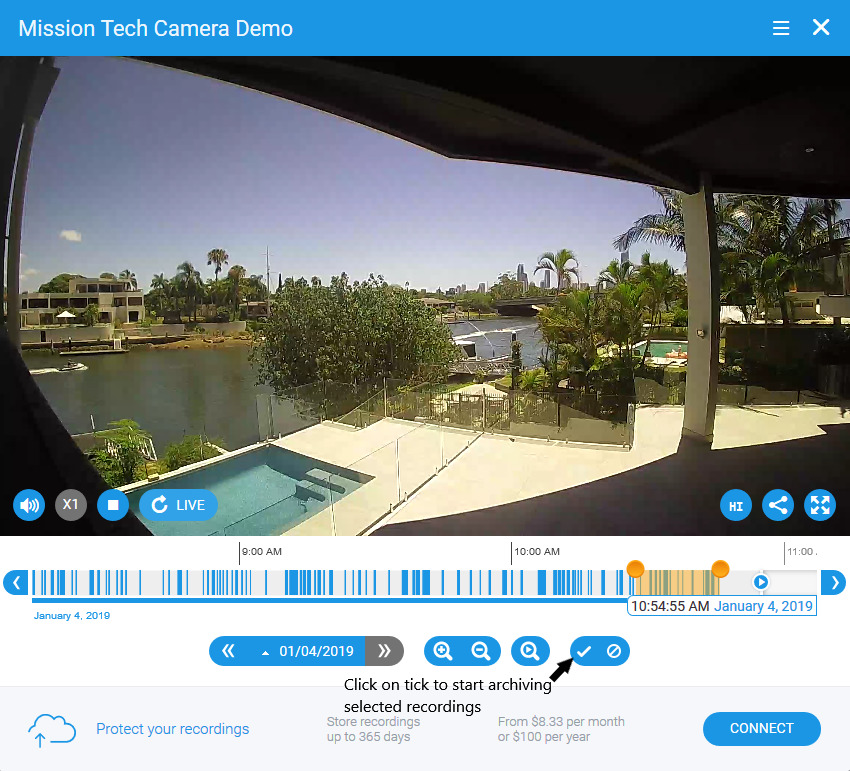
To start archiving click on the √ symbol.
Step 6
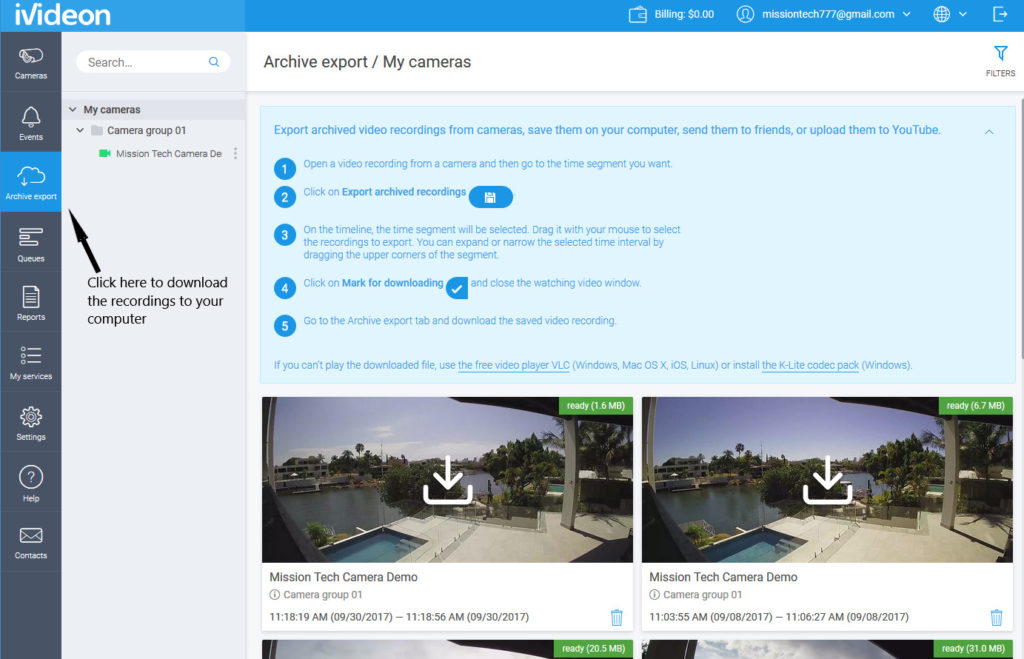
Finally to download the recordings to your personal computer, click on Archive export and follow the instructions.
Want Cloudyfy on your next install? Book a dealer demo or see how Cloudyfy works.